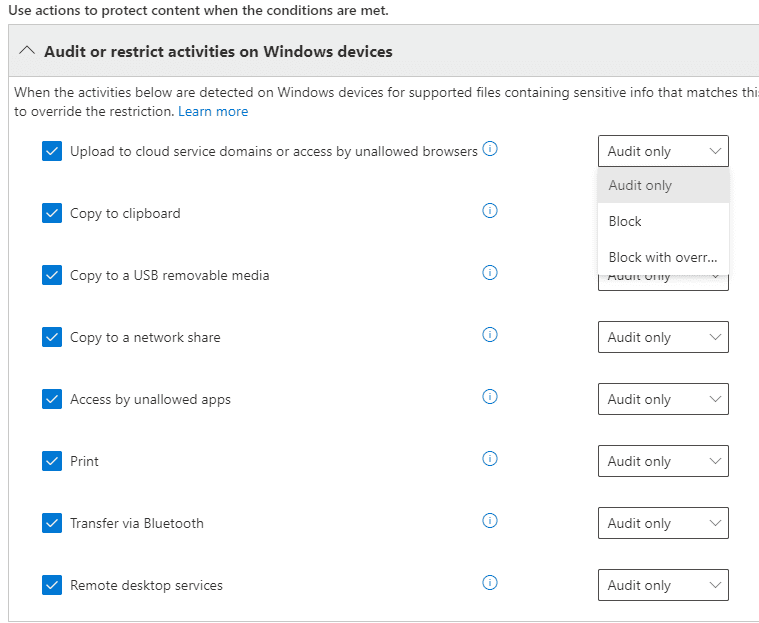
For example, we could Audit or restrict activities on Windows devices:
Compliance Manager, Data Loss Prevention, and Communications Compliance
Microsoft has made significant investments in its Security and Compliance offerings. These features give you the ability to protect sensitive content on your Office 365 platform as well as comply with regulatory requirements you might be subject to, but many IT organizations find adoption of these features daunting. There is so much to learn to implement the tools correctly, not to mention deriving the business rules around acceptable use of sensitive information. In this 3-part blog, we’ll get introduced to the portal and it’s features, and think about the best first steps you can take on with your organization.

So what do we have here?
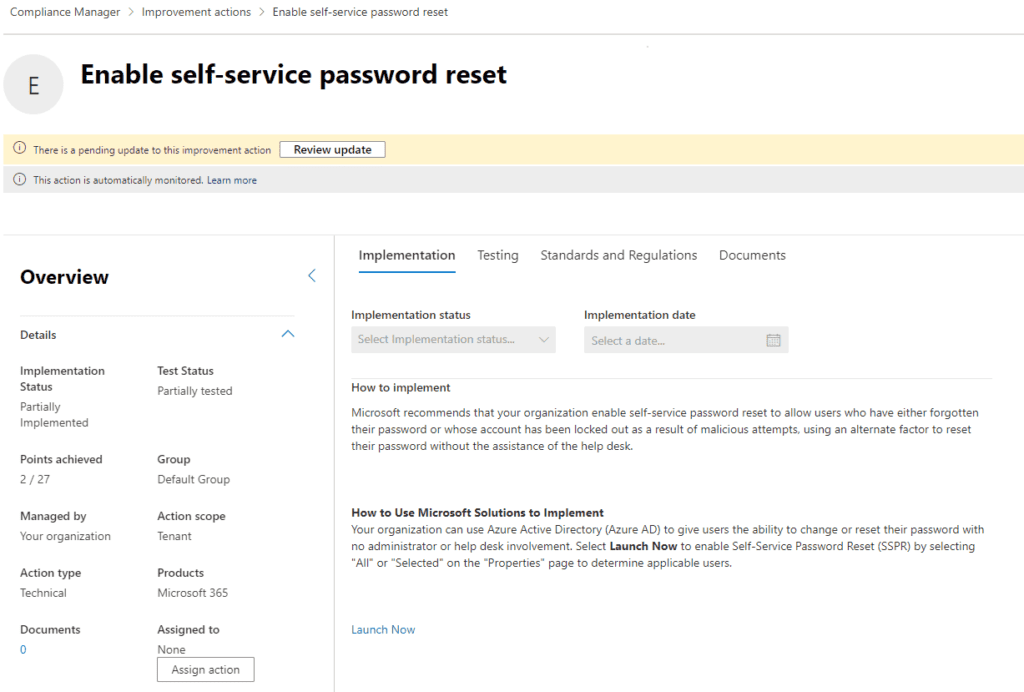
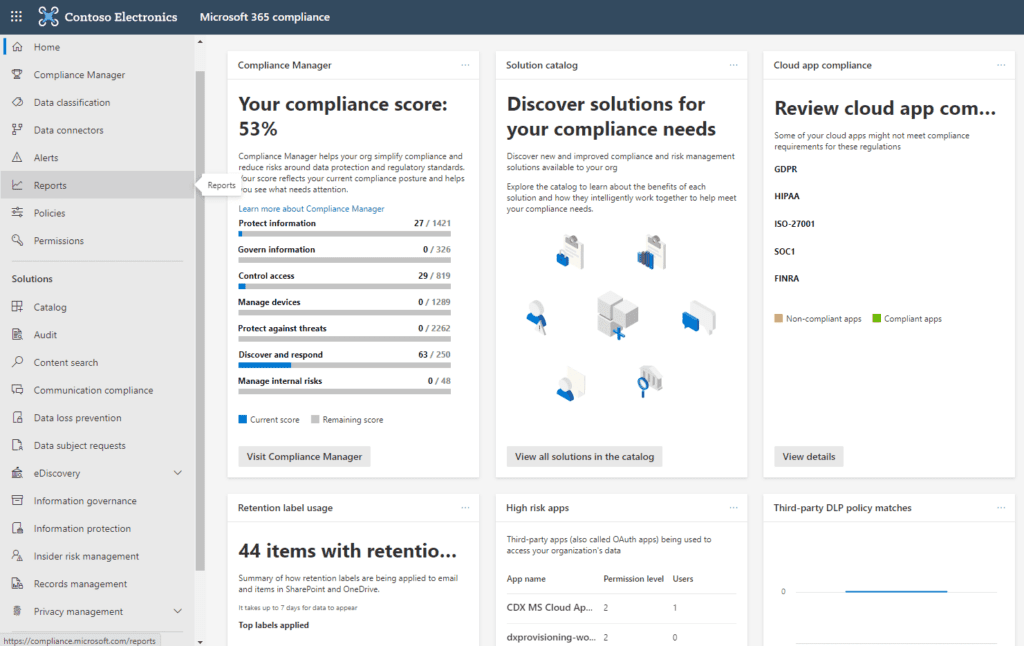
First is the Compliance Manager. The Compliance Manager gives you your current compliance score which is derived mostly through Microsoft telemetry. There are a list of Improvement Actions that, when completed, add points to your Compliance Score. Most of the available points are already achieved by steps Microsoft has taken on your behalf. For example, out of the 20,562 total possible points in this tenant, over half are already achieved by Microsoft. The remainder get assigned as you complete various improvement actions. The first on this list is “Enable self-service password reset.”
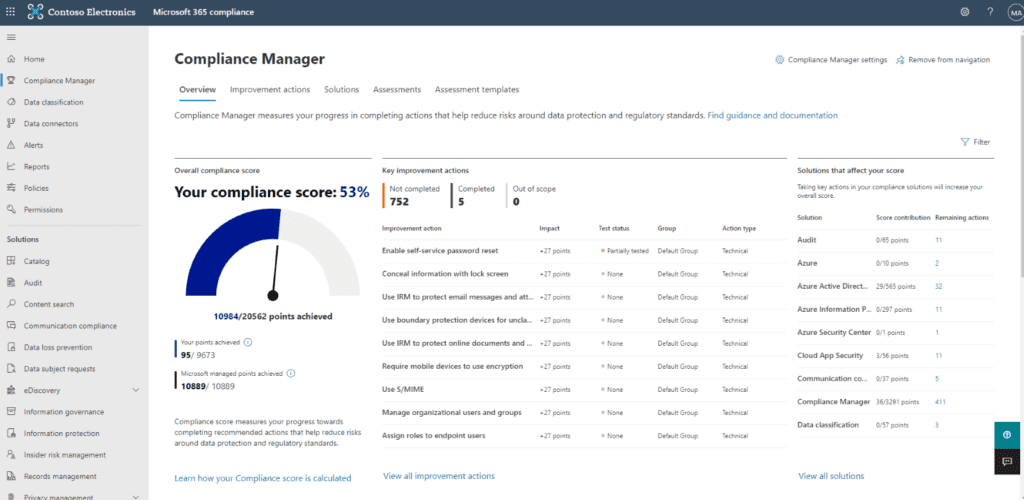
Each improvement action listed provides a description, steps to be taken to achieve this improvement, and some features to help manage the process, document it, and link to relevant regulations.
On the Compliance Manager screen you’ll see a tab labeled “Assessment Templates.”
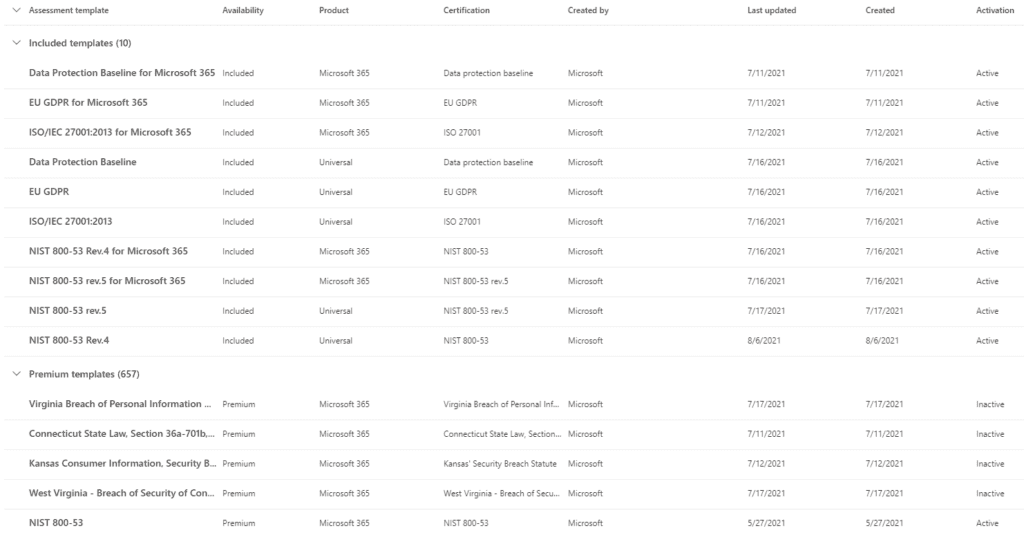
Microsoft, at the time of this writing supports 667 different Assessment templates designed to bring your Office 365 platform in compliance with specific regulatory requirements your firm may be obliged to meet. Each assessment has a list of Improvement Actions which, once completed, would indicate your platform is compliant with the related regulatory framework. Some example include GDPR, HIPAA and NIST 800.
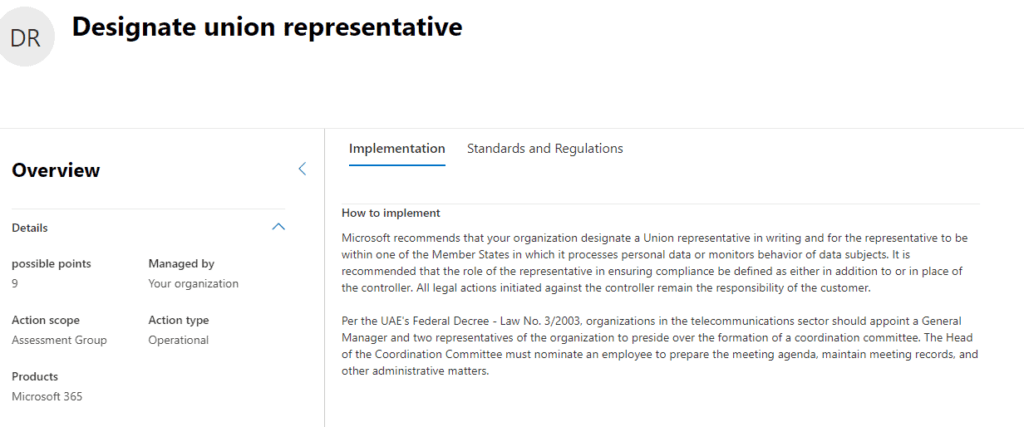
The solutions found in the Compliance portal provide the means to accomplish many of the Improvement Actions though solutions to Actions are found throughout your tenant. In addition, some Improvement Actions have nothing to do with Microsoft telemetry at all but are satisfied by recording the fact that you have accomplished it. For example, from the GDPR list of Improvement Actions:
Our recommendation is to review the Improvement Actions of the Compliance framework(s) your organization is obliged to comply with and prioritize a subset of them. Perhaps focus on ones that are easiest for you to accomplish or the ones that will give you the greatest value. Then begin to work through them. The Compliance Score gives you a tangible way to measure your progress against your Compliance goals, as well as a great way to report to others in the organization on that progress.
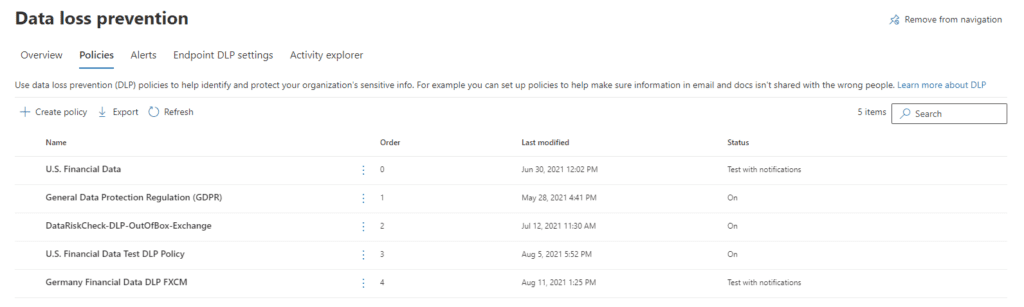
2. Compliance Portal: Data Loss Prevention
In our last section, we talked about the Compliance Manager, how your Compliance Score is calculated, and how you go about improving that score by satisfying various recommended improvement actions. In this part, we’ll take a deep dive into one of most commonly deployed Compliance solutions: Data Loss Prevention (DLP.)
The concept behind DLP is that there is content on your tenant which may represent a privacy vulnerability to the organization: Social Security Numbers, Credit Card Numbers, ABA Routing numbers and so on. While there are perfectly good reasons why this kind of content should reside on your tenant, and perfectly good use cases for staff to access it, we don’t want unauthorized access to that content nor inappropriate sharing of it. For example, two AP clerks may share employee SSNs and credit card numbers with each other in the normal conduct of their work. However, if one of them attempts to share a list of employee credit card numbers with someone outside the tenant, we’d want to know about it and possible stop it. DLP is designed to manage this.
We start by creating a DLP policy. The policy uses some kind of user provided condition that would trigger a match. Out of the box, Microsoft provides three pre-built templates to start a policy, but we can also build out our own custom policy. The pre-built templates are:
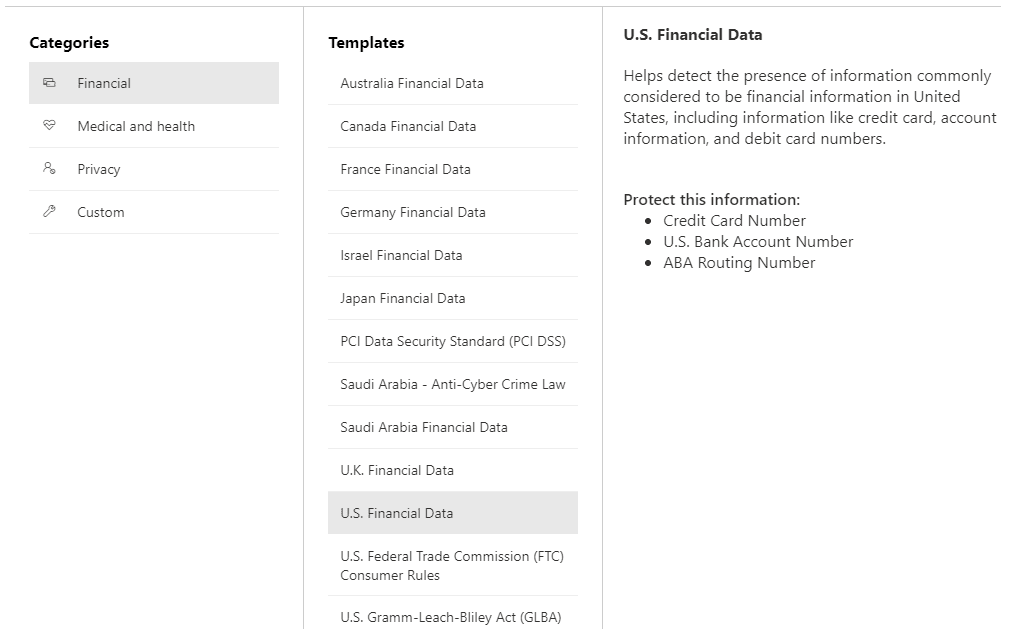
The Financial template enables you to choose from a collection of pre-built sensitive information types for various countries as shown below.
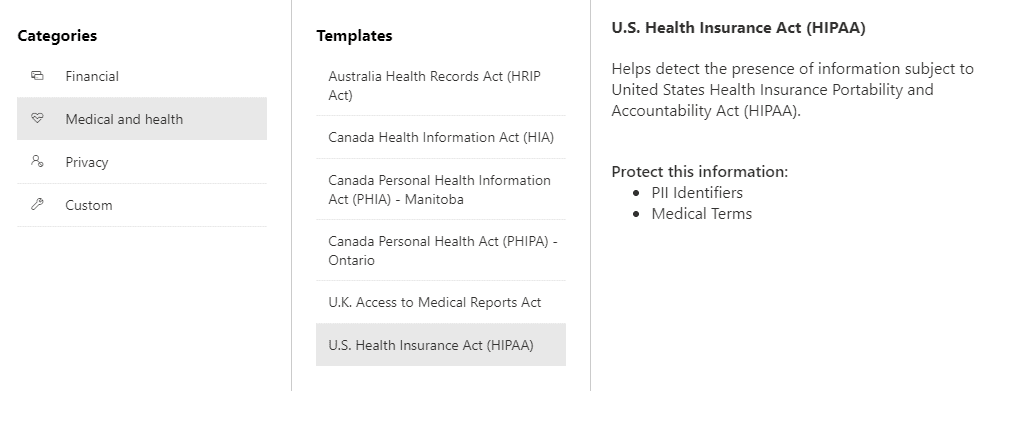
Similarly, the Medical and Health care template has its own sensitive information types.
However, we begin our policy, we name it, provide a description and then decide on the scope of the policy for our tenant.

We can cover the entire tenant with a single policy or be as granular as we wish, selecting, say, just a particular SharePoint site or a collection of OneDrive accounts for senior staff, for example. Next, we articulate the rules that will trigger a policy match
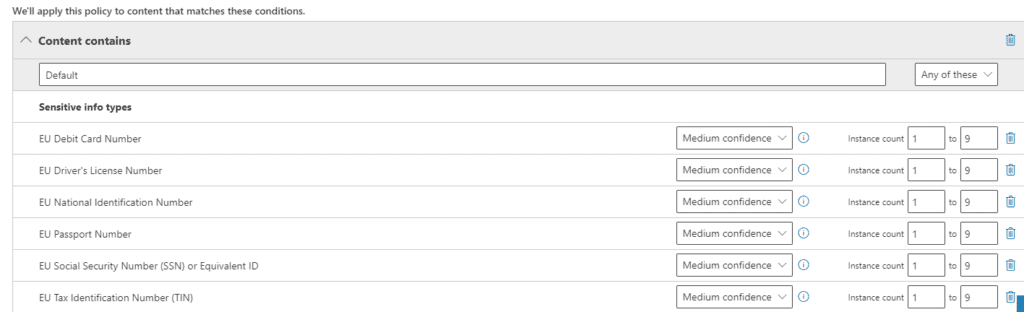
We’ve seen the term “Sensitive Information Types” above, but it’s important to understand it as you’ll see it in several places on the Compliance portal. There are two kinds of Sensitive Information Types: seeded ones provided by Microsoft, and custom ones you build. Above you see some examples of Microsoft provided types. You can build your own to detect organization specific templates such as Employee Id’s or Customer #’s. You could also designate keywords you care about such as the name of a confidential project or aspect of intellectual property as a Sensitive Information Type. Microsoft’s examples generally include “Project Enigma” as a custom type, for example. Once created, we can use Sensitive Information Types to drive policies like DLP and Document retention.
Confidence levels are Low, Medium, and High. Confidence levels are driven by three factors:
A High confidence policy match would be one in which the Primary element is associated with more supporting elements whereas a Low confidence match would be one in which the Primary element is not associated with many supporting elements. For example, if we were wanted to develop a policy to identify Contract documents, our Primary element might be “Contract” and Supporting elements could include “Task,” “Terms and Conditions,” “Start Date,” “End Date,” and “Amount.” The presence of these supporting elements in a document being evaluated to see if it might be a contract gives us a high level of confidence that this candidate is likely a Contract. In practice, High confidence matches will have the lowest false positives, but may have more false negatives, whereas low confidence matches are more likely to have more false positives.
Given a positive policy match there are a number of actions we may want the policy to take:
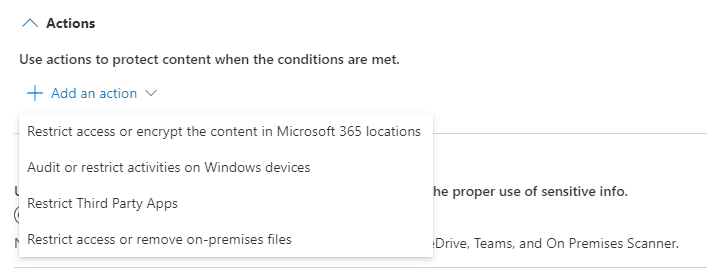
For example, we could Audit or restrict activities on Windows devices:
We can also trigger notifications of various kinds:
We can allow the user to override restrictions on their ability to share or use content after providing a justification.
Once we’ve completed the policy, we can decide how we want to introduce it to our tenant:
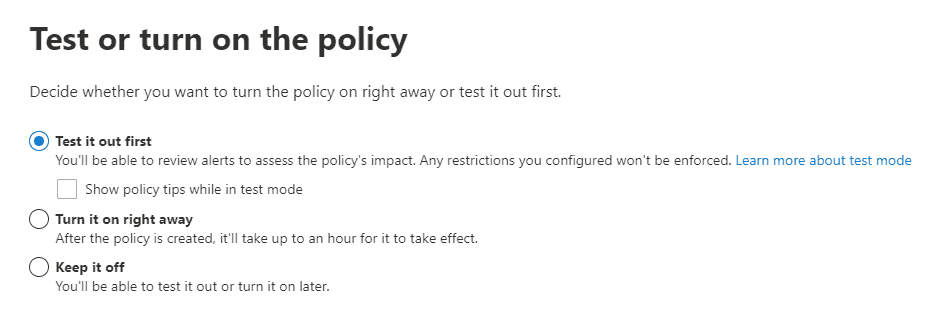
In general, we would recommend that you test the policy first, followed by communication to the organization that this DLP policy will be implemented. You can take a next step by turning on policy tips alerting the user that they are interacting with data covered by a DLP policy. Then when you’re ready, turn it on.
In our next section, we’ll look at Communications Compliance and how you can employ it to create a safer environment for all staff.
3. Communications Compliance

As staff collaborate and communicate on the Office 365 platform, some may use inappropriate language that creates a hostile work environment for other staff members. A judgement that an organization has allowed a hostile work environment to exist or taken no action to eliminate it may experience serious to severe reputational and / or financial damage. The Communications Compliance solution gives organizations the ability to monitor their tenant for various kinds of undesirable speech and take action when violations occur. With some work, you can even prevent the transmission of undesirable speech in real time.
As with DLP, we can begin with seeded policies Microsoft has begun for you including:
As else where these policies use sensitive information types and trainable classifiers to detect certain kinds of speech and allow you to take various actions when content is detected.
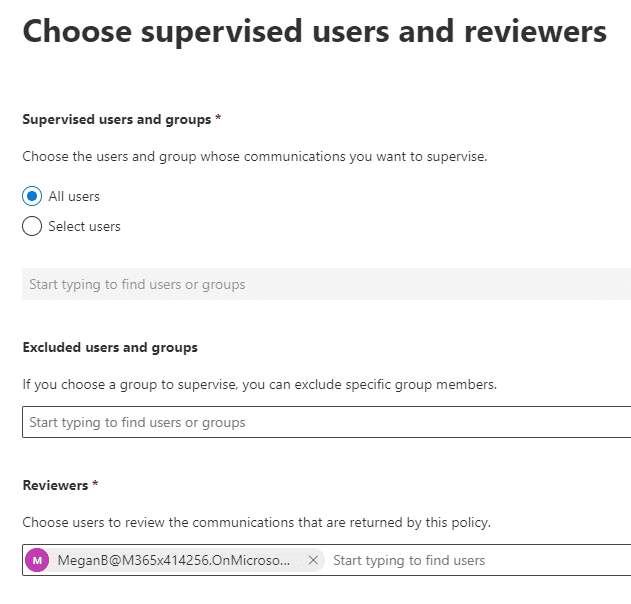
When creating a new policy, we name it and provide a description. Then we can decide which users or groups of users we want to apply the policy to. We can exclude users in those groups that we want to exclude and we designate users who will receive notifications about policy matches. The best practice is to have Microsoft configure the policy, but then assign someone with a compliance responsibility to analyze policy matches and make decisions about reporting and escalation.
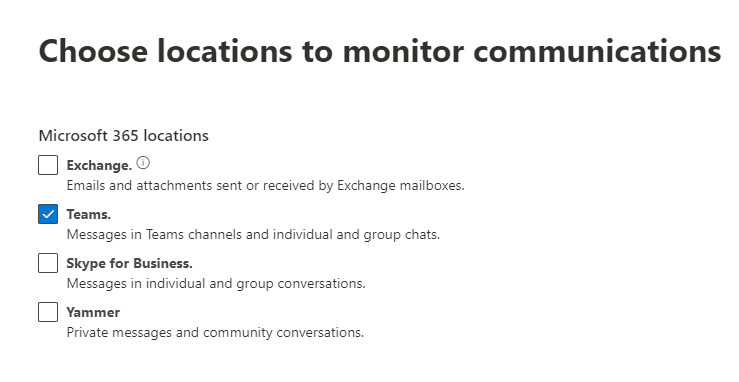
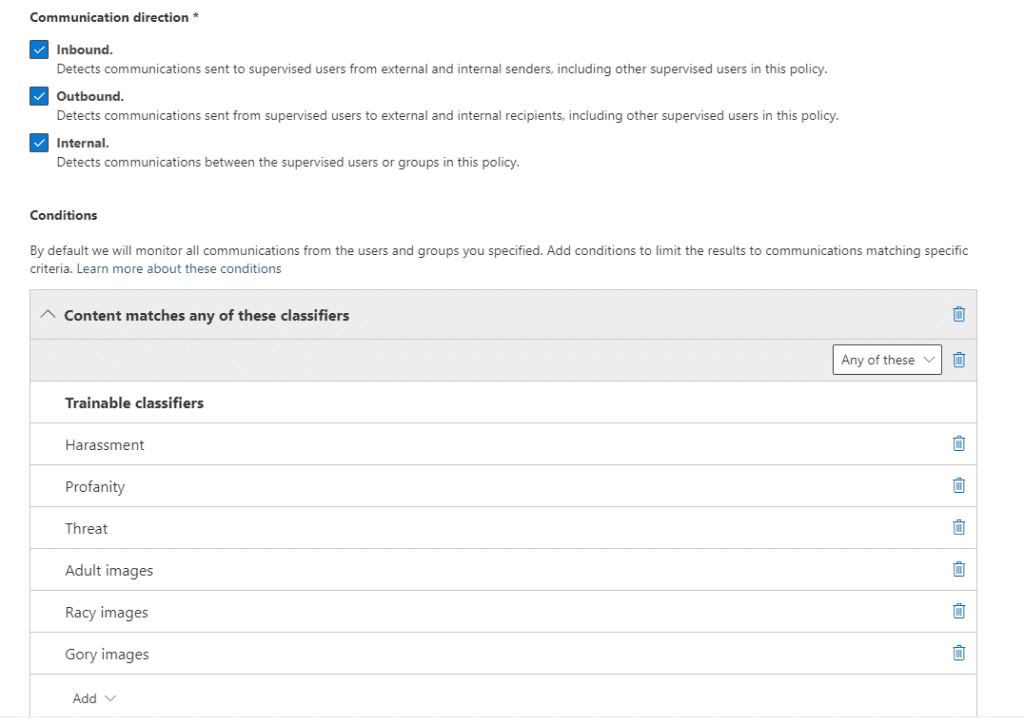
As elsewhere, we provide a scope – where the policy should be active across our tenant. For example, K-12 and higher education institutions that have online classes in Teams may want to monitor Teams chat to protect against inappropriate language between students.
We then decide what kind of content we want to monitor for. In this example, we’re using Microsoft’s built-in classifiers for offensive language. Communications Compliance supports monitoring of offensive language in many different languages. You can also configure what kinds of communication will be monitored: Inbound, Outbound, or Internal. You can also limit the amount of content the match returns from, say, all policies to only 50% of all policy matches. This could be useful if you’re scanning for content across the tenant to understand the magnitude of your content challenge. In the case that you are investigating an allegation that a user has used harassing language, you probably want 100% of your matches to confirm the extent of the violation.
Once we save off the policy, Microsoft will kick off a scan. You may need to wait several hours before the scanning has completed.
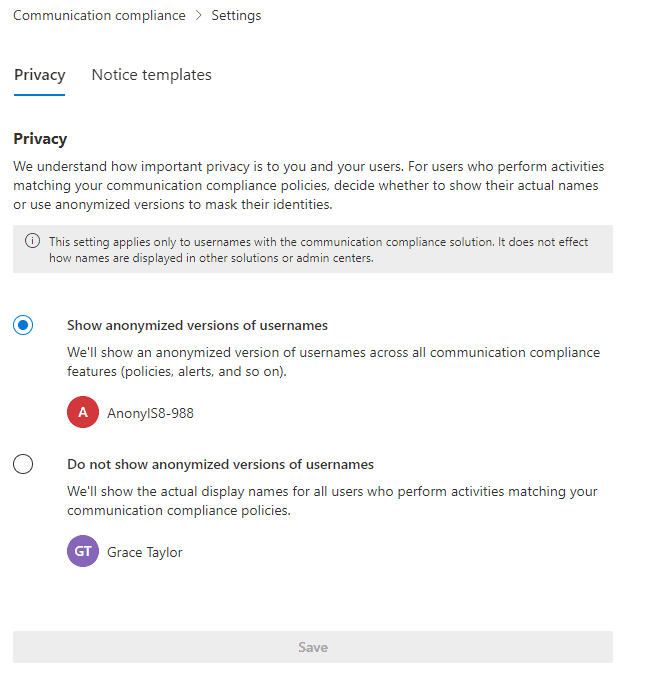
As we think about the results that are going to be returned, given the sensitive nature of the returned content, we may wish to anonymize those results which we can do in Communication Compliance Settings:
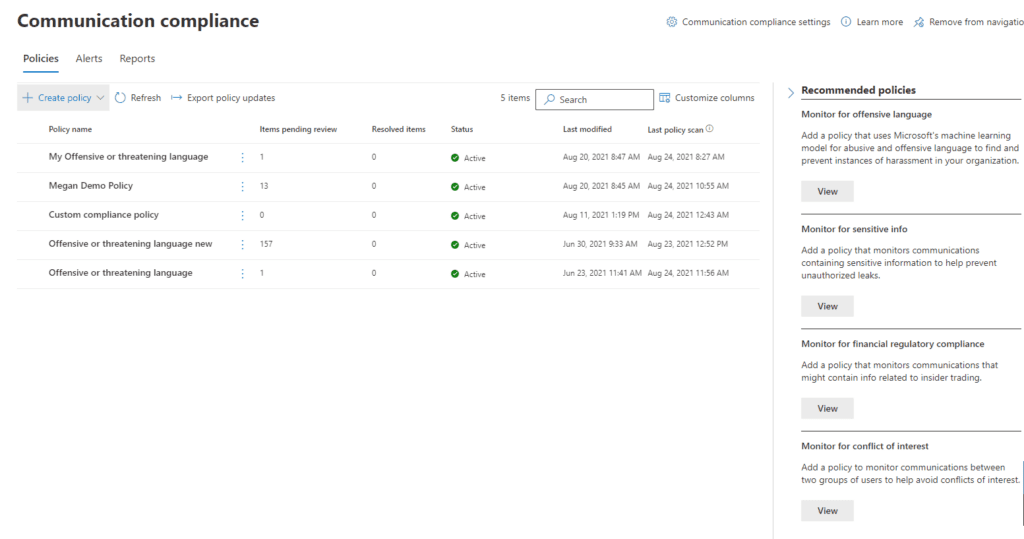
Summaries of our policy matches can be found in reports.

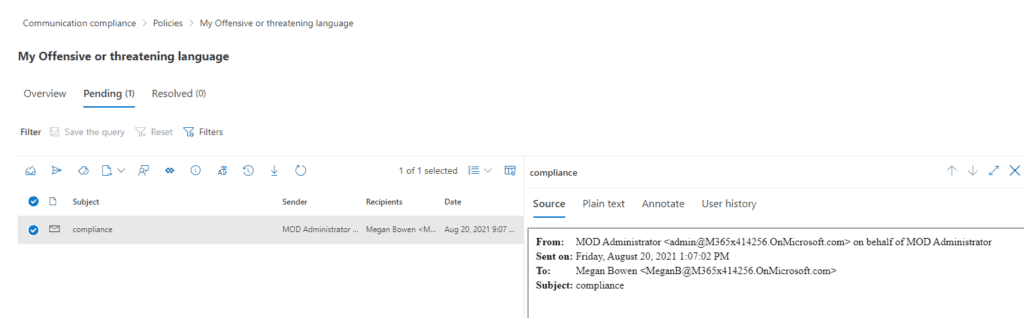
Clicking on the policy on the Communication Compliance screen will display any pending items for review. This role should be limited to someone in a Compliance role rather than IT. Check out the list of roles and their access rights here.
When we inspect Pending items, we are shown the actual content that generate the policy match and can take action as indicated.
Summary
In summary, the Communications Compliance gives us the ability to monitor communications for violations of language use that we care about in our tenant. It discovers policy violations after the language has been used, but as mentioned, you can build a custom sensitive information type and include it in a DLP policy to stop the language from being used in the first place.
Keep in mind that this is one of those compliance areas where it is important to maintain separation of duties between IT and those who have specific compliance responsibilities. IT should not be monitoring and following up on these kinds of policy matches.
Work with our team of Cloud Computing Consultants with years of experience that know all of the “minefields” to prevent missteps.
Last updated on July 31st, 2023 at 11:59 am